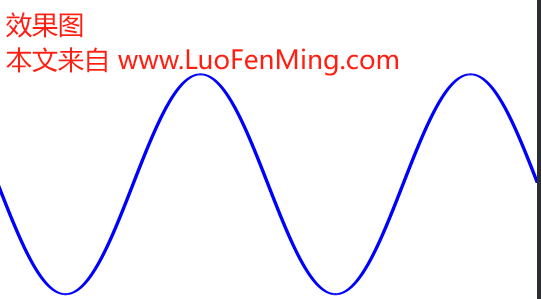
1.创建自定义 View,创建一个继承自View的自定义类,在这个类中实现波形图的绘制逻辑。
package com.zhkh.khpec.utility

import android.content.Context
import android.graphics.Canvas
import android.graphics.Color
import android.graphics.Paint
import android.util.AttributeSet
import android.view.View
import kotlin.math.PI
import kotlin.math.sin


class ACVoltageWaveformView @JvmOverloads constructor(
    context: Context,
    attrs: AttributeSet? = null,
    defStyleAttr: Int = 0
) : View(context, attrs, defStyleAttr) {

    private val paint: Paint = Paint().apply {
        color = Color.BLUE
        style = Paint.Style.STROKE
        strokeWidth = 4f
    }

    private var amplitude = 220f // 电压幅值
    private var frequency = 1f // 频率
    private var phase = 0f // 相位


    /**
     * 更新视图
     * */
    fun  updateView(frequency:Float){
        this.frequency=frequency
        invalidate()
    }
    override fun onDraw(canvas: Canvas) {
        super.onDraw(canvas)
        val width = measuredWidth.toFloat()
        val height = measuredHeight.toFloat()
        val centerY = height / 2
        canvas.drawColor(Color.WHITE)

        for (x in 0 until width.toInt()) {
            val t = x / width * 2f // 模拟时间变化
            val y = amplitude * sin(2 * PI * frequency * t + phase) + centerY
            if (x > 0) {
                val prevX = x - 1
                val prevY = amplitude * sin(2 * PI * frequency * (t - 1 / width * 10f) + phase) + centerY
                canvas.drawLine(prevX.toFloat(), prevY.toFloat(), x.toFloat(), y.toFloat(), paint)
            }
        }
    }
}
2.在布局文件中使用自定义 View
<?xml version="1.0" encoding="utf-8"?>
<LinearLayout xmlns:android="http://schemas.android.com/apk/res/android"
    xmlns:tools="http://schemas.android.com/tools"
    android:id="@+id/LinearLayout1"
    android:layout_width="match_parent"
    android:layout_height="match_parent"
    android:orientation="vertical"
    tools:ignore="MissingClass">

    <com.zhkh.khpec.utility.ACVoltageWaveformView
        android:id="@+id/waveform_view"
        android:layout_width="match_parent"
        android:layout_height="match_parent" />

</LinearLayout>
3.刷新波形图
//打到id为waveformView的控件,然后调用ACVoltageWaveformView里面的方法updateView
binding.waveformView.updateView(i)
本文来自 www.luofenming.com