先介绍一下整理
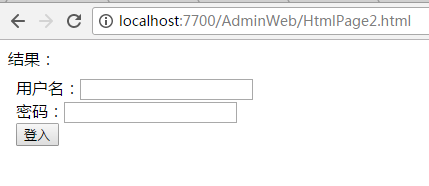
htmlPage2.html是登入界面 里面嵌套了一个htmlPage1.html
然后htmlPage1.html通过javascript post发送数据通过LoginHandler.ashx进行数据处理
此实例来自http://www.luofenming.com 不懂的可以找我,我可以免费的教你
以下是htmlPage2.html代码
<!DOCTYPE html>
<html>
<head>
<meta http-equiv="Content-Type" content="text/html; charset=utf-8"/>
    <title></title>
	<meta charset="utf-8" />
</head>
<body>
    结果:<span id="txtResult"></span><br />
    <iframe src="HtmlPage1.html" name="upload" align="top" frameborder="0" style="height: 120px; width: 400px;"></iframe>
</body>
</html>
以下是htmlPage1.html代码
<!DOCTYPE html>
<html>
<head>
<meta http-equiv="Content-Type" content="text/html; charset=utf-8"/>
    <title></title>
	<meta charset="utf-8" />
    <script type="text/javascript">
        function GetData() {
           var userName = document.getElementById("txtUserName").value;
           var userPwd = document.getElementById("txtUserPwd").value;
           if (userName == "") {
               alert("帐号不能为空");
               return;
           }
           if (userPwd == "") {
               alert("密码不能为空");
               return;
           }
            StandardPost('LoginHandler.ashx', { 'userName': userName, 'userPwd': userPwd });//调用post发送方法

        }
        function StandardPost(url, args) {//纯JS post发送数据
            var myForm = document.createElement("form");
            myForm.method = "post";
            myForm.action = url;
            for (var k in args) {
                var myInput = document.createElement("input");
                myInput.setAttribute("name", k);
                myInput.setAttribute("value", args[k]);
                myForm.appendChild(myInput);
            }
            document.body.appendChild(myForm);
            myForm.submit();
            document.body.removeChild(myForm);
        }
    </script>
</head>
<body>
        用户名:<input type="text" id="txtUserName" /><br />
        密码:<input type="text" id="txtUserPwd" /><br />

        <input type="button" value="登入" id="btnSend" onclick="GetData()" />
</body>
</html>
以下是LoginHandler.ashx代码
using Bll;
using System;
using System.Collections.Generic;
using System.Linq;
using System.Text;
using System.Web;

namespace Share.AdminWeb
{
    /// <summary>
    /// LoginHandler 的摘要说明
    /// </summary>
    public class LoginHandler : IHttpHandler
    {

        public void ProcessRequest(HttpContext context)
        {

            context.Response.ContentType = "text/html";
            string userName = context.Request.Form["userName"];//要改为request.Form["txtname"]当然都可以只用request["txtname"]
            string userPwd = context.Request.Form["userPwd"];
            string msg = LoginInfo(userName, userPwd);
            if (!string.IsNullOrEmpty(msg))
            {
                context.Response.Write("OK<script>window.parent.document.getElementById(\"txtResult\").innerText = \"lqwvje\";window.setTimeout(function () {window.parent.location.href = 'index.aspx';}, 2000);</script>");
                //成功之后跳转到后台
            }
            else
            {
                context.Response.Write("err<script>window.parent.document.getElementById(\"txtResult\").value = \"帐号或密码错误\";window.setTimeout(function () {location.href = 'htmlPage1.html';}, 2000);</script>");
                //不成功
            }


        }
        public string LoginInfo(string userName, string userPwd)
        {
            string msg = string.Empty;
            Model.Account account = AccountBll.GetModel(userName);
            if (account == null)
            {
                return msg=null;
            }
            if (Common.CFun.Encrypt(userPwd.Trim(), "Share").Equals(account.LoginPwd))
            {
                msg = "ok";
            }
            return msg;
        }
        public bool IsReusable
        {
            get
            {
                return false;
            }
        }
    }
}